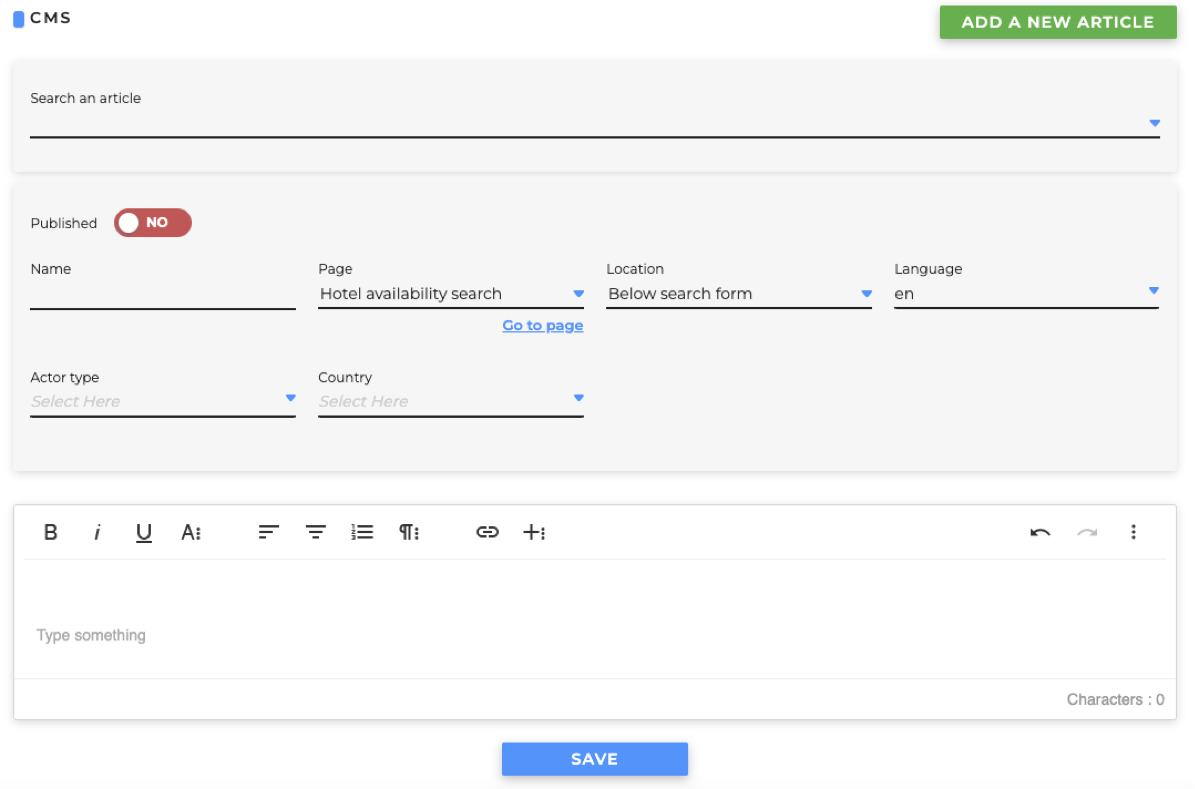
The article management section can be found in the menu > CMS > CMS management.

To add a new article, click on the button at the top on your right.
In the first upper part of the page, there is a section for adding and searching for pre-existing articles through the appropriate drop-down menu. To search, choose an article from the drop-down menu "Search for an article".
The names in the list of available items have a structure that indicates some useful information. Let's see two examples:
- "[P] Banner transfers form (Above search form)": where [P] stands for "published", "Banner transfers form" is the name of the article and the position is indicated in brackets
- "Alert hotels form (Sub search form)": this case is identical to the one above, except for the absence of the [P] meant this article is not published contrary to the previous one.

In the central part there is the management of the publication rules:
- the PUBLISHED YES / NO switch specifies whether the article is visible to everyone or not.
- NAME [required] the name of the article. It is not public, it needed to understand what it is about.
- PAGE [required] the page where the article must be shown.
- POSITION [required] in which position to show the article. Positions are managed by TOWeRS and not by the end-user. They are always above and below the search forms and availability searches for each service. If you think you need other available positions please let us know by opening a ticket as indicated here https://guides.netstorming.net/it/guida-per-la-creazione-del-ticket.
- LANGUAGE for which language that article will be displayed. If no language is selected it will be visible to all.
- ACTOR TYPE multiple selections that allow the article to be displayed to a specific type of user.
- Multiple select COUNTRY allows you to view the article based on the geographical origin of the final user.
- Multiple select NETWORK allows you to view the article based on the network of the final user.
- Multiple select GROUPS allows you to view the article based on the boundgroup of the final user.

The final part contains the actual visual editor. All the elements in the upper left part are useful for stylization (B, i, U, A) followed by keys for the alignment of the texts and bulleted lists of various types. Finally, the buttons to add links, images and create tables. In the last section on the right, in addition to some minor features, there is the possibility to see the generated HTML source, operate directly on the code or for example, copy it from other examples (we will then see the management of design blocks).
